Rolled roofing looks simple. Almost too simple, honestly. Big roll, black surface, slap it down and nail it, done. That thinking is how people end up with bubbles, leaks, and seams that lift the first hot afternoon. The proper way is slower, more methodical, and a little boring if you rush things. But boring is good for roofs.
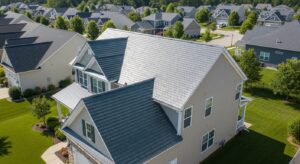
Rolled roofing is usually used on low slope roofs, sheds, porches, garages, and small utility structures. It is not meant to compete with architectural shingles in lifespan, but when installed right, it performs exactly as expected. When installed wrong, it fails early and loudly.
Start with the right roof conditions
Rolled roofing should only be installed on roofs with a low pitch. Typically 2 12 or less. Anything steeper invites sliding and seam stress. The roof deck must be solid, dry, and flat. Old shingles should be removed unless the manufacturer explicitly allows installation over them, which many do not.
Plywood or OSB sheathing should be firmly fastened. Any soft spots must be replaced. Even small dips can cause water to pool, and pooled water is unforgiving. Clean the surface. Dirt, sawdust, loose nails, all of it matters more than people think.
Weather timing matters more than muscle
Rolled roofing becomes stiff in cold weather. Trying to install it below recommended temperatures leads to cracking and poor adhesion. Most manufacturers suggest installing when temperatures are above 50 degrees Fahrenheit. Warm rolls lay flatter and seal better.
Similar to how low winter temperatures cause everything from water to motor oil to thicken and sometimes freeze, cold weather changes roofing materials, too. Low temperatures alter the physical properties of roofing adhesives, sealants, primers, and coatings, and the handling characteristics of roofing membranes as they become more rigid in the cold. While low temperatures might change certain materials, the cold doesn’t have to put an end to your roofing season as long as you use the right products for the job and follow specific storage and application recommendations.
https://www.genflex.com/bulletin/cold-install-roof
If the material has been stored cold, let it sit in the sun for a while. That waiting time feels wasteful, but it saves hours of frustration later.
Underlayment is not optional
A proper installation always includes underlayment. Asphalt saturated felt or a compatible synthetic layer goes down first. This adds protection and smooths out minor imperfections in the deck.
The underlayment should overlap properly, usually 2 inches on sides and 4 inches on ends. Fasten it flat. Wrinkles under rolled roofing show through and can cause premature wear. Many leaks blamed on the top layer actually start here.
Measure and plan before unrolling anything
Rolled roofing should be installed parallel to the eaves, starting at the lowest point of the roof. Measure the roof width and plan overlaps. Most rolls are 36 inches wide, but the effective coverage is less because overlaps are required.
Side laps are typically 2 inches. End laps are usually 6 inches and sealed with roofing cement. Dry fitting the first roll avoids awkward seams later. Once adhesive is involved, mistakes become expensive and sticky.
Apply roofing cement where it actually belongs
Roofing cement is not peanut butter. It is not meant to be spread everywhere. Apply a thin, even layer along the starting edge at the eaves. This helps seal the first course against wind driven rain.
For end laps, cement goes under the overlap and sometimes on top depending on product instructions. Too much cement causes bubbling and slow curing. Too little allows water intrusion. Follow the pattern, not intuition.
Nailing pattern is precise, not casual
Use galvanized roofing nails with large heads. Nails are placed along the edges, usually every 3 to 4 inches, and staggered slightly to avoid splitting. Nails should sit flush, not sunk and not proud.
Never nail through exposed field areas unless the manufacturer allows it. Most rolled roofing systems rely on overlaps to cover fasteners. Exposed nails become leak points faster than anything else.
Overlaps and seams decide the roof lifespan
Each new course overlaps the previous one. That overlap must be straight and consistent. Crooked seams collect water and look sloppy. Press seams firmly, especially in warm conditions where adhesion activates better.
End laps should never align in a straight vertical line across courses. Stagger them. This reduces concentrated water paths and improves overall resistance. This step is often skipped and later regretted.
Edge finishing and penetrations need extra care
Edges, vents, and penetrations are weak points. Metal drip edge is recommended along eaves and rakes when allowed by local codes. Rolled roofing should extend slightly over the edge and be sealed cleanly.
Around vents or pipes, flashing and roofing cement work together. Do not rely on cement alone. Water always finds shortcuts.
Final inspection
Once installed, walk the roof carefully. Look for loose edges, missed nails, bubbles, or thin cement coverage. Fixing issues immediately is easier than returning after a storm exposes them.
Rolled roofing does not forgive shortcuts. But when installed with patience and respect for details, it performs reliably for its intended lifespan. The proper way is rarely the fastest way, but it is always the quieter one.